Compared to third-party data recovery programs, the native Windows 10 recovery tool is much better, and it’s super fast. Since it’s a native Windows 10 tool, the data recovery rate will be much higher than any other third-party tools. The only drawback is that it’s a command-line program, which might disappoint lots of users.
Steps to Use Microsoft’s New Windows File Recovery Tool:
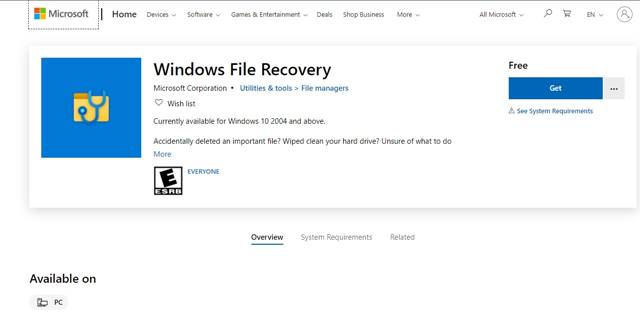
So, in this article, we are going to share a detailed guide to recover deleted files by using the Windows Recovery tool. So, let’s check out. Step 1. First of all, open Microsoft store and download the Windows Recovery tool.
Step 2. Now, wait until the program installs on your system.
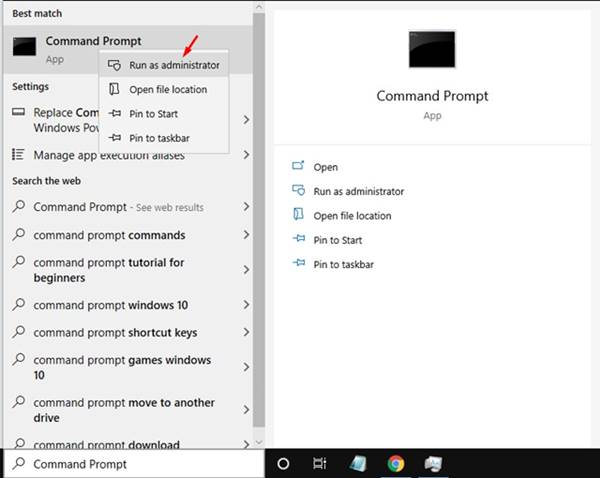
Step 3. Once installed, open Windows search and search for CMD. Right-click on the CMD and select ‘Run as administrator’
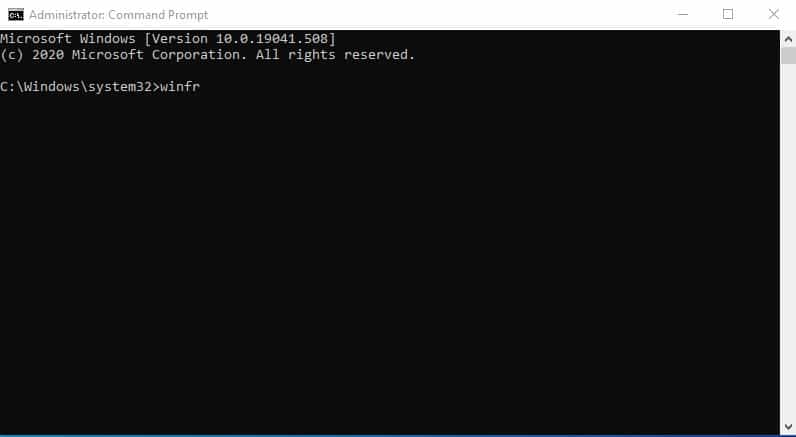
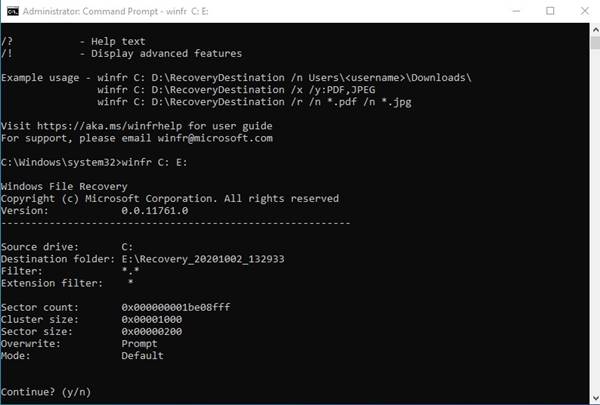
Step 4. On the Command Prompt Window, enter the command – winfr. This command will show you all command-line syntax of Windows file recovery.
Step 5. If you want to search the whole drive for deleted files, enter the command – winfr C: E: (Here “C” is the drive that you want to scan, and “E” is the drive where you want to store the recovered files). In my case, the Recovery tool will scan the deleted files in ‘C’ drive and will store the recovered files in the ‘E’ Drive.
Step 6. After running the command, enter ‘Y’ on the command prompt and hit enter.
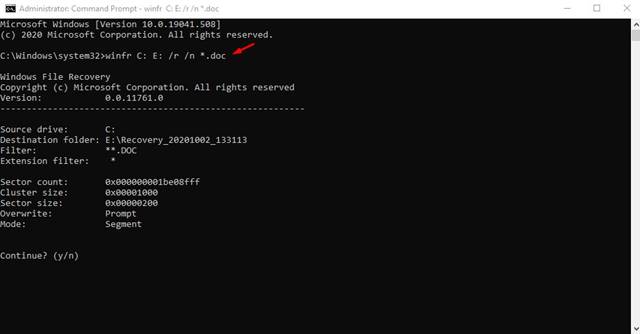
Step 7. Now, if you want to scan for a particular file format, enter the given command. winfr C: E: /r /n *.doc
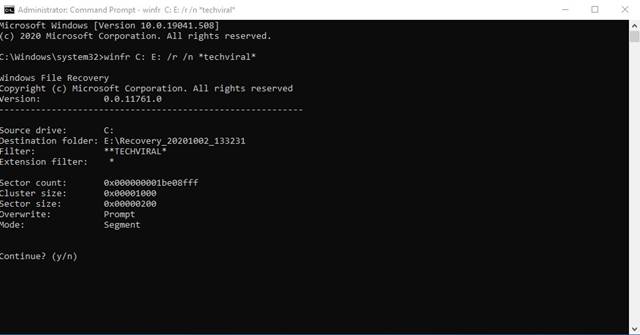
The above command will scan for the deleted DOC files in C drive and will store the recovered files in the E drive. Similarly, you can execute the same command for other file types. For example, for pdf files, enter the command – winfr C: G: /r /n *.pdf For MP3 file, enter the command – winfr C: G: /r /n *.mp3 You can use different file extensions such as .mp4, .ppt, .zip, etc. on the command-line syntax. Step 8. If you want to scan a file based on its name, then you need to execute the command – winfr C: E: /r /n techviral
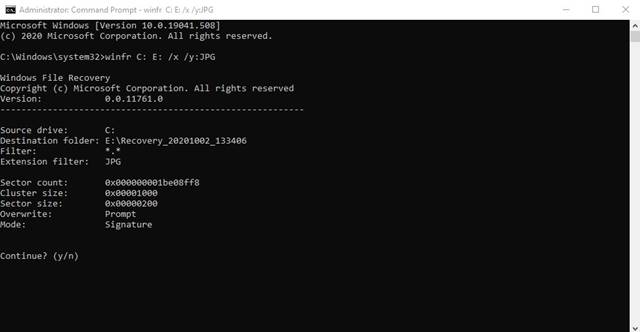
Step 9. For a deep scan, you just need to replace the /r /n with /x /y. For example, winfr C: E: /x /y:JPG (The above command will scan the entire ‘C’ drive (deep scan) for the JPG file and will store the recovered files in the ‘E’ drive.
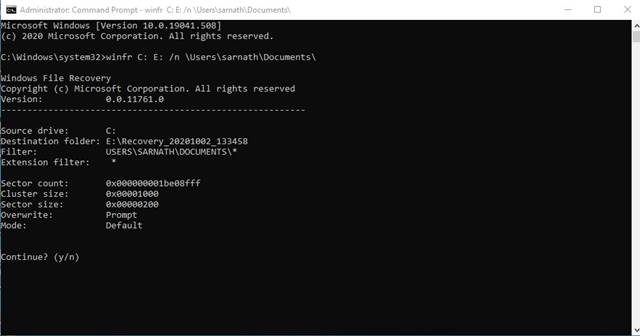
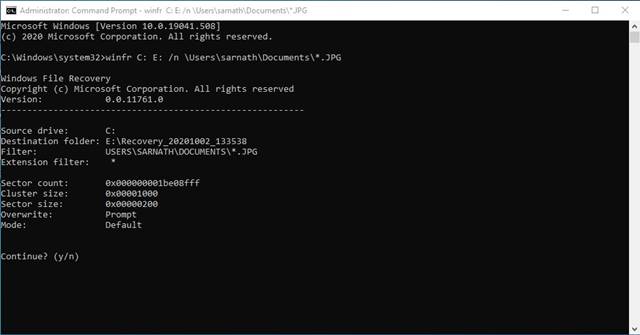
Step 10. Now, if you want to scan a particular folder to recover deleted files, execute the command- winfr C: E: /n \Users\yourusername\Documents\
The above command will recover the deleted files from the Documents folder on ‘C’ drive and will store it on the ‘E’ drive. Step 11. If you want to scan a particular file format in a folder, then execute the command: winfr C: E: /n \Users\yourusername\Documents*.JPG
The above command will scan every JPG files stored in the Documents folder of ‘C’ drive and will store it on the ‘E’ drive.
Conclusion
So, that’s all about how to use the native data recovery tool of Windows 10. This tool can recover almost every file type. I hope this article helped you! Please share it with your friends also. If you have any doubts related to this, let us know in the comment box below.
Δ