Doing so will help you raise questions in various Android forums and take help from a developer. And taking screenshots on Android is not easy, as you have to connect your Android to your PC and depend on a third-party utility.
Steps to Take Screenshots in Recovery Mode on Android
Hence, if you are looking for ways to take screenshots in Recovery Mode on Android, you are reading the right guide. Below, we have shared a step-by-step guide on how to capture screenshots in Recovery Mode. Let’s get started.
First, you need to boot your android in the Recovery mode and then connect it to your PC via a USB cable.
Now, on your PC, you need to download the file Recovery Screenshot capture toolkit and then extract it on your Desktop.
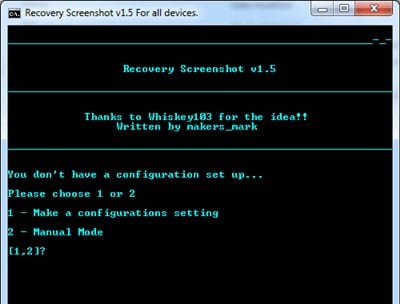
Now open the extracted folder, and there you need double click on the file RUNrs.bat.
Now, a command line program will appear, and you just need to follow the guide. Select option 1 to make configuration settings.
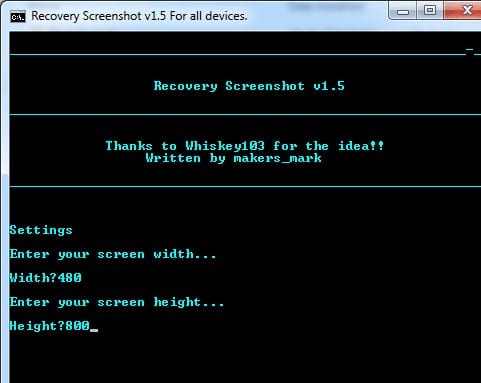
Now, you need to mention your screen width and height, so google your device’s screen size and fill in the appropriate value.
Now the process will start, and it will take a screenshot of your device, and you will see you it will get saved in your folder.
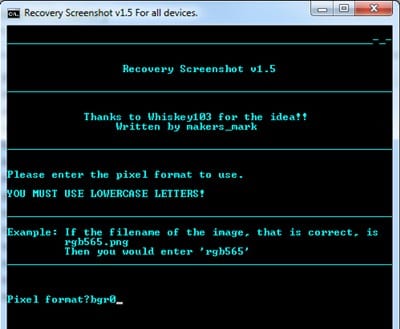
Now, in the toolkit, you will see a new folder, Pixel_formats, where you will find the screenshots of your recovery. You need to select the best-fit screenshot of your device and note the file name.
After that, you need to select 1 option from this Tool and enter the file name you noted earlier.
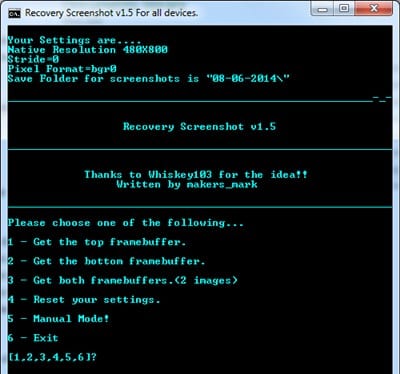
That’s it! Now you can do anything you want from your Recovery mode, like custom ROM and wipe data; select option 3 to take the screenshots. You can easily take screenshots in Recovery mode on Android by following these steps. If you need more help in capturing screenshots in Recovery mode, let us know in the comments below.


