Discord is very popular amongst gamers, and it’s known for its simplicity. If you are a Discord user, you might know about Discord Servers. Servers on Discord were communities that users could join. Once you create a Discord server, you can add different channels – some for text and some for voice chats. While setting up a Discord server, users were presented with two options – Private & Public Server.
Understanding the Public Server
Most servers on forums, websites, and social networking sites were set to Public. For example, when a Discord server is set to Public, anyone can join if they have a link to access the server. Usually, the Public servers on Discord were centered around popular topics such as games, movies, etc. Therefore, you will find many Discord Public Servers for games and other popular topics online.
Understanding the Private Server
Unlike Public Servers, which allow everyone to join and become a part of a community, Private servers were meant for a specific niche. Users can join a private server only when the server owner has invited them. Private servers were meant to prevent outsiders from viewing all the channels on your servers.
Make a Discord Server Private or Public
When you create a Discord server, you can make the server public or private. So, if you have missed the option, you can change the privacy later whenever you want. Here’s how to make Discord Server Private or Public.
1) How to Make Discord Server Private
If you wish to make your Discord Server Private, follow some of the simple steps we have shared below. Here’s how to make Discord Server Private.
First of all, open Discord on your PC. You can also use the web version to make the privacy changes.
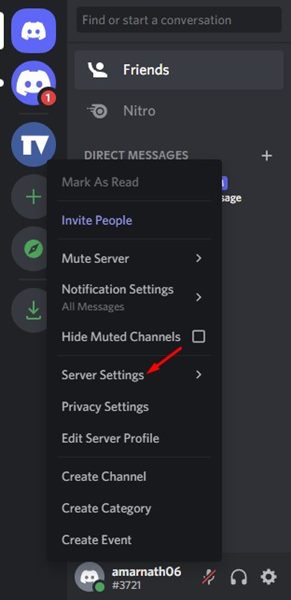
Now, on the left pane, right-click on your server and select Server Settings.
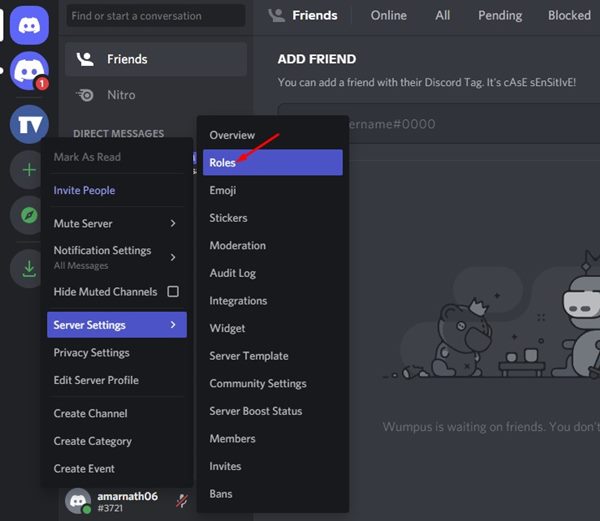
From the list of options, click on the Roles tab.
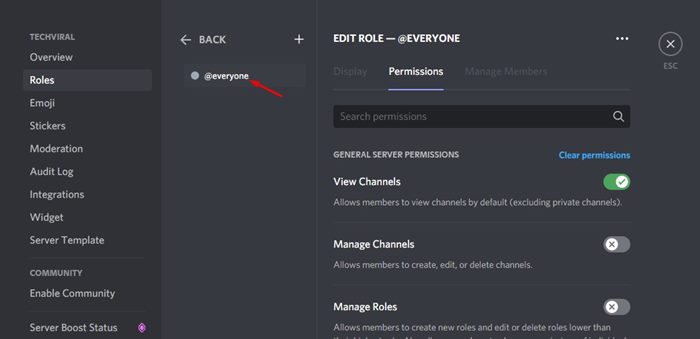
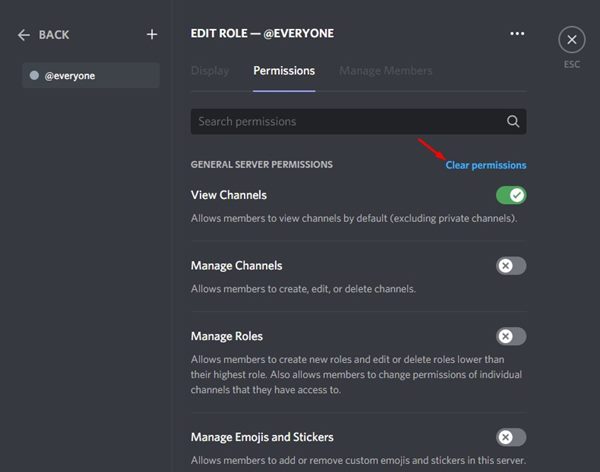
Now, on the right, select the @everyone.
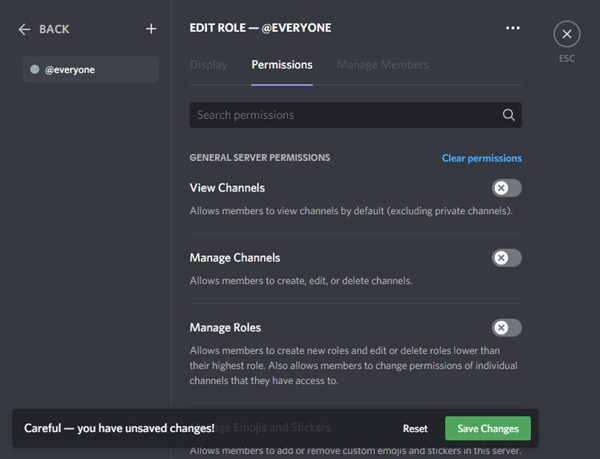
On the right, you need to turn all permissions off. Alternatively, click on the Clear Permissions button.
Once done, click on the Save Changes button. That’s it! The Clear Role Permissions button will automatically disable all toggles for all permissions. This will make your Discord server private.
2) How to Make Discord Server Public
Discord offers many controls you can enable or disable to make the server public. You can even modify the Discord Server settings to make your server semi-public. Here’s how to make Discord Server public on a desktop.
First of all, open the Discord app on your PC. Alternatively, you can use the web version to make the privacy changes.
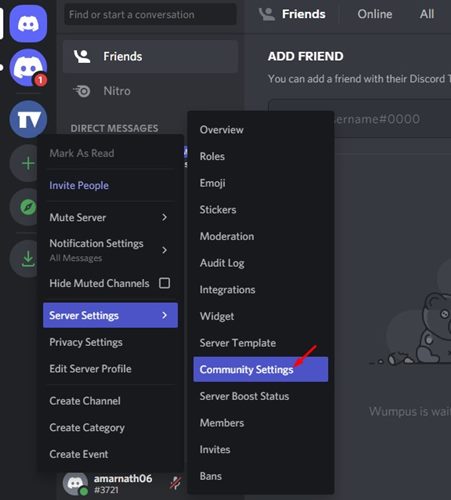
Now, on the left pane, right-click on your server and select Server Settings.
From the list of options, select Community Settings.
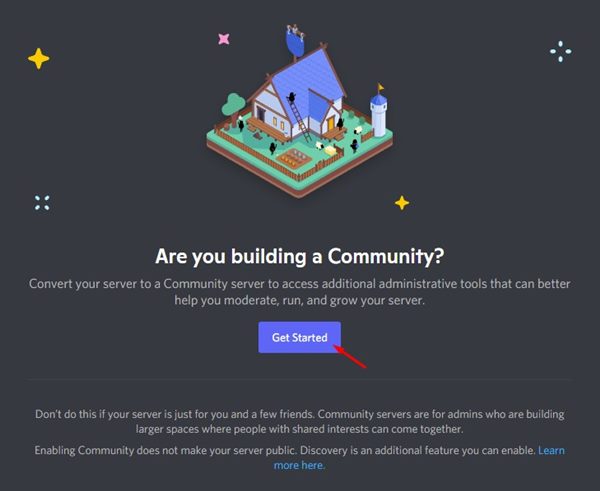
Click the Get Started button on the Are you building a Community prompt.
Follow the on-screen instructions to make your Discord Server Public.
That’s it! So, this is how you can make a Discord server public or even semi-public.
3) How to make your Discord server Public on mobile?
If you use the Discord mobile app, you must follow these steps to set up a public Discord server on mobile. Here’s what you need to do.
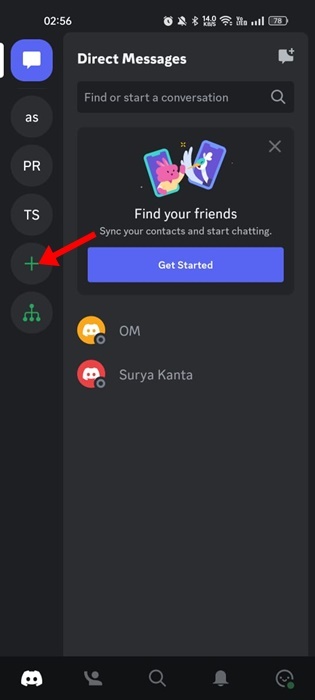
Open the Discord app and sign in to your account. Next, tap on the (+) icon on the left side.
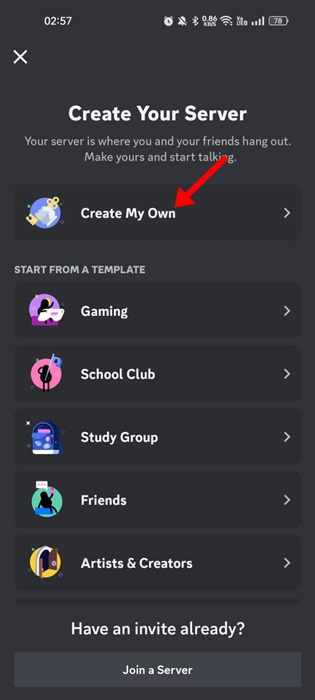
On the Create Your Server screen, tap ‘Create My own‘.
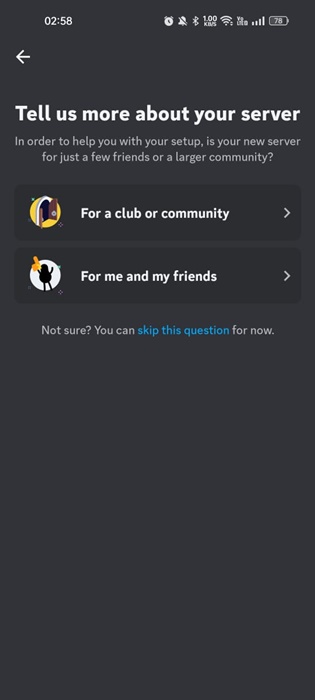
Provide some extra information about the server on the next screen. You can select for me and my friends.
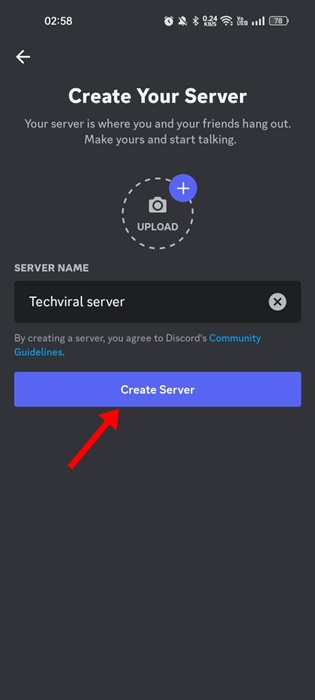
Next, enter the server name, upload the picture, and tap on the ‘Create Server‘ button.
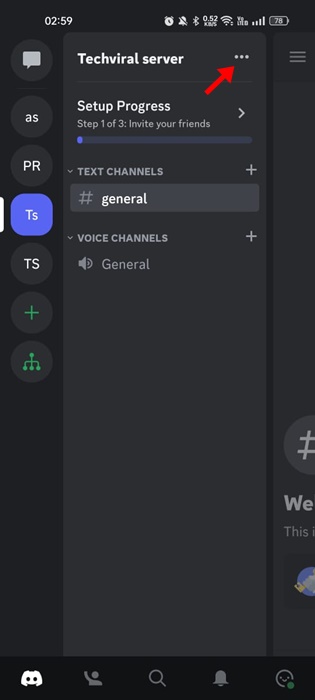
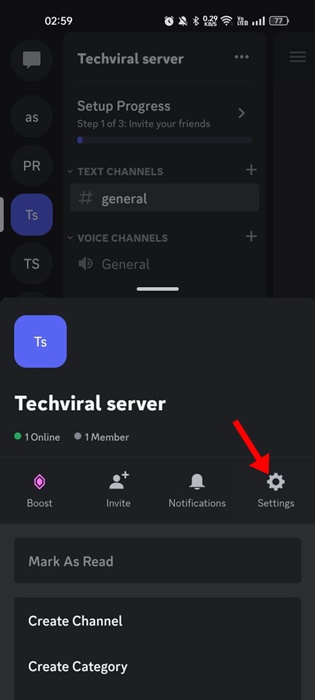
Once the server is created, tap on the three dots beside the server name.
On the prompt that appears, select ‘Settings‘.
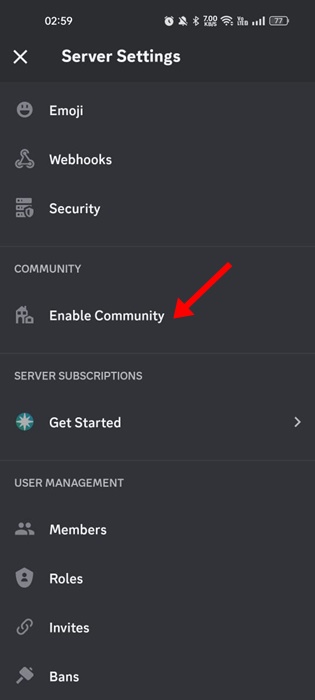
On the Server Settings, scroll down to the Community section and tap ‘Enable Community‘.
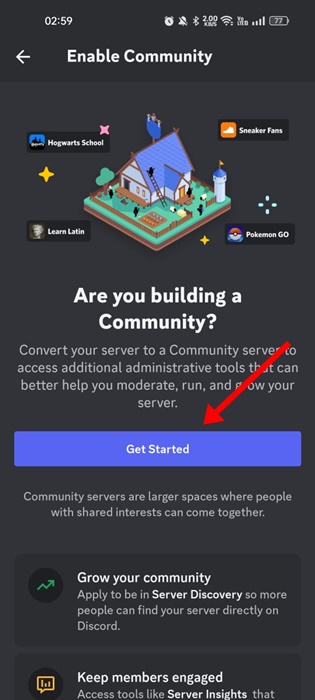
On the Enable Community screen, tap on Get Started.
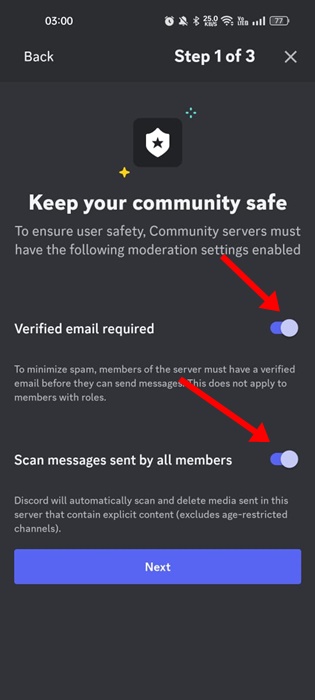
Next, toggle on the ‘Verified email required‘ and ‘Scan messages sent by all members‘ and tap the Next button.
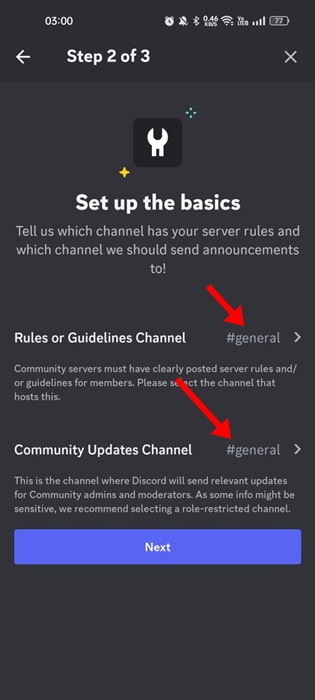
On the Set up the basics screen, select #general for both options and tap on Next.
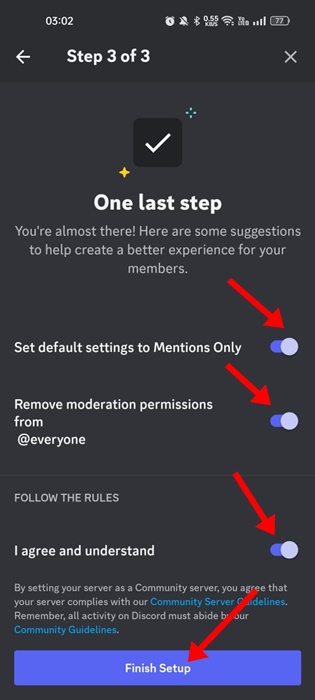
On the final step, enable the three options on the screen and tap the ‘Finish Setup‘ button.
That’s it! This is how you can make your Discord Server Public on Mobile. Making a Discord server private or public on the web version or via the desktop client is pretty easy. I hope this article helped you! Please share it with your friends also. Also, if you have any doubts about this, let us know in the comment box below.