You can access Facebook Watch through the main website and its mobile apps. The video service has both short and long-form videos. Since Facebook now has many video contents, it has introduced a feature to create a video playlist. Also Read: How to Recover Deleted Facebook Posts
Steps to Create & Manage Video Playlists on Facebook
So, if you often watch videos on Facebook and want to save some videos to view later, you need to utilize the video playlist feature. You can create as many video playlists as you want in the Facebook app and add your favorite videos. Below, we have shared a step-by-step guide on creating a video playlist in the Facebook app.
1) Create a Video Playlist on Facebook
To create a video playlist, use the Facebook app on your Android or iOS device. The steps are the same for both Android & iOS users.
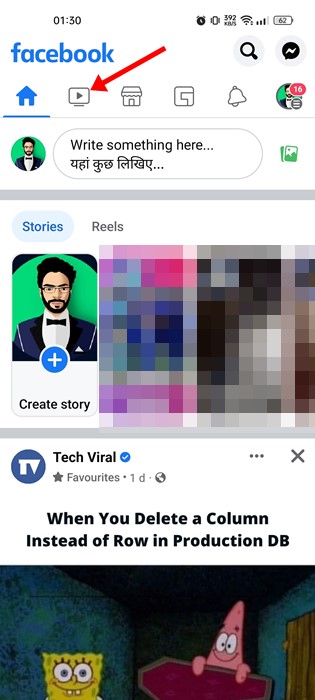
First of all, open the Facebook app on your smartphone. Next, tap on the Watch button.
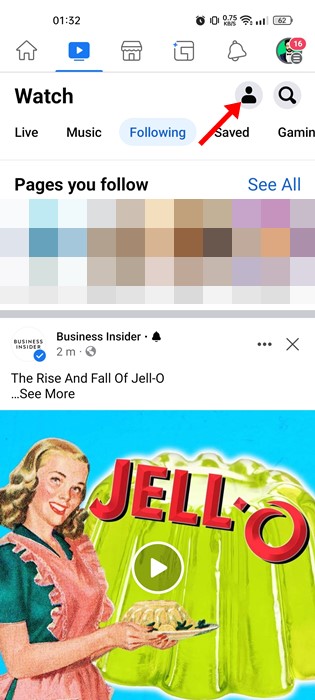
On the Facebook Watch screen, you need to tap on the profile icon in the top-right corner.
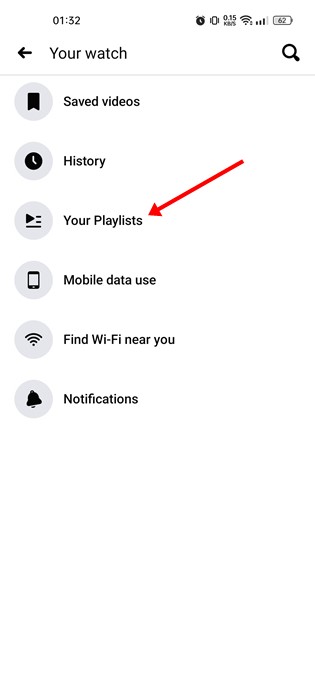
On the Your Watch page, tap on the Your Playlists.
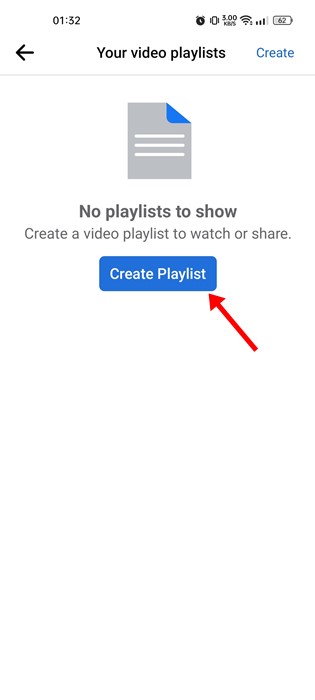
On the next screen, tap on the Create Playlist button.
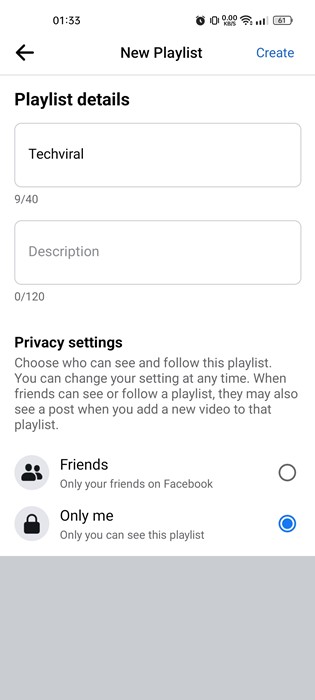
Now, enter the Playlist details on the New Playlist screen – Name, Description, and Privacy Settings. Once done, tap on the Create button.
That’s it! This is how you can create a video playlist in the Facebook app for Android & iOS.
2) How to Add videos to the Playlist?
After creating a playlist on Facebook, you might want to add videos. To add videos to the playlist in the Facebook app, follow some of the simple steps shared below.
First, open the Facebook app and tap on the Watch.
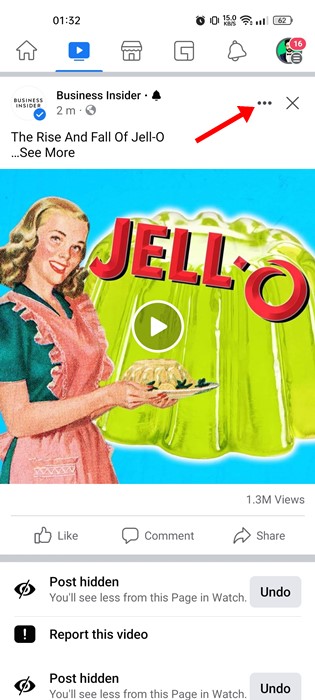
You need to find the video you want to add to the Playlist. Next, tap on the three dots in the top right corner of the video interface.
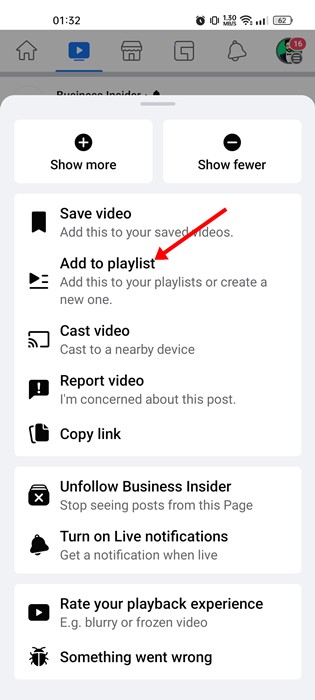
From the list of options that appears, tap on the Add to Playlist option.
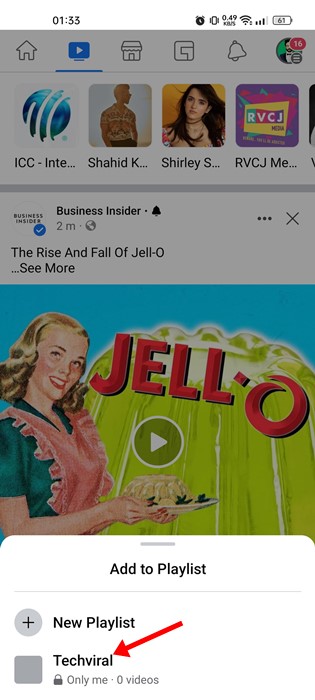
On the Add to Playlist pop-up, tap on the Playlist name where you want to save the video.
That’s it! This is how you can add videos to the Playlist in the Facebook app.
3) Remove Videos From a Playlist
If you wish to remove videos from a playlist, follow these steps. Here’s how to remove videos from a Video playlist in the Facebook app.
Open the Facebook app and switch to the Watch. Next, tap on the profile icon, and on the next screen, tap on Your Playlists.
On the Your video playlists screen, choose the playlist from which you want to remove videos.
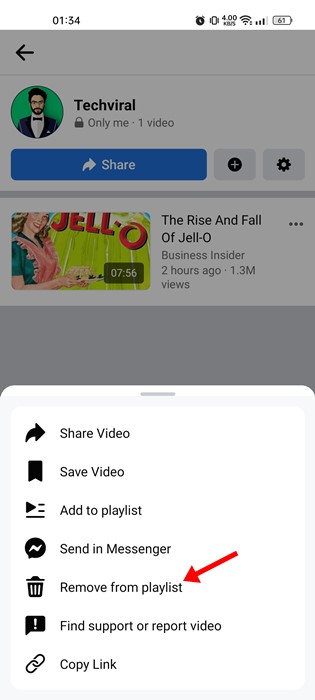
Now, you will find all the saved videos. You need to tap on the three dots beside the video name.
On the menu that pops up, select the Remove from Playlist option.
That’s it! This is how you can remove videos from a playlist in the Facebook app.
4) Delete a Video Playlist in Facebook App
If you don’t want to keep a video playlist, you can delete it in easy steps. Here’s how you can delete a video playlist in the Facebook app.
First, open the Facebook app and switch to the Watch. Next, tap on the profile icon, and on the next screen, tap on Your Playlists.
On the Your video playlists screen, tap on the playlist you want to delete.
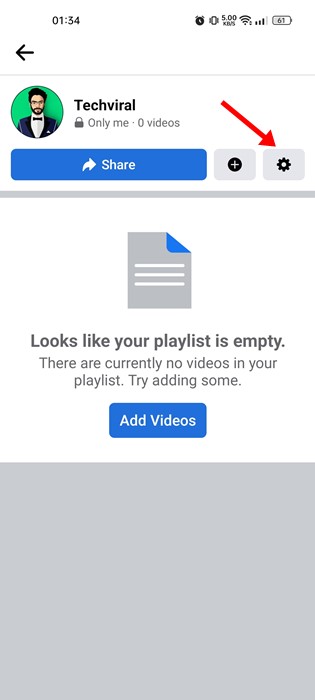
On the playlist screen, tap the Settings icon in the top-right corner.
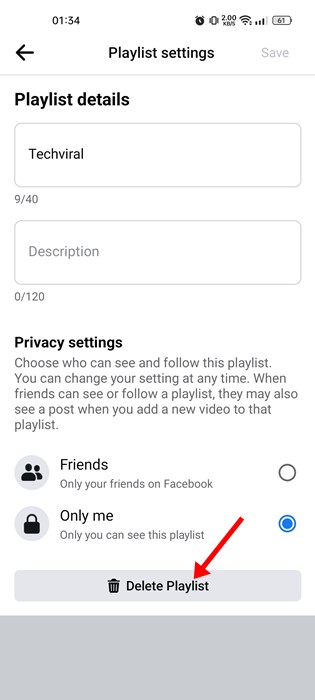
On the Playlist settings screen, tap the Delete Playlist option.
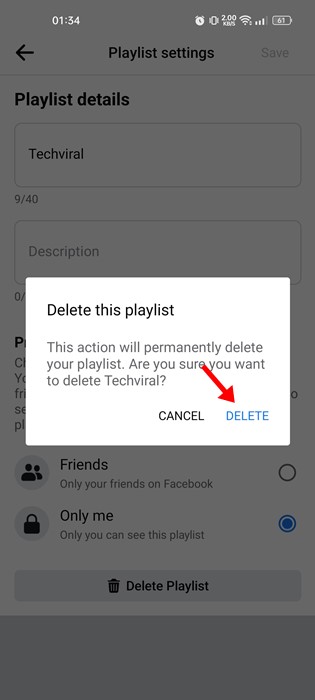
On the confirmation prompt, tap on the Delete button again.
That’s it! This will permanently delete your video playlist on Facebook.
5) How do I share my video playlists on Facebook?
The video playlist you create on Facebook can be shared. So, if you want to share your video playlists, follow the steps shared below.
Open the Facebook app and tap on the hamburger menu at the top right. Next, tap on the Videos on Watch. On the top right corner, tap on the profile icon. Now tap on Your Playlists. Now select the playlist you want to share and tap on the Share icon. On the Share prompt, tap on the drop-down and select where to share the playlist.
That’s it! This is how you can share your video playlists on the Facebook app. Also Read: How to Share Your Location With Facebook Messenger So, that’s all about creating and managing a video playlist in the Facebook app. If you are a video lover, you should start using the video playlist feature of Facebook. If you need more help, let us know in the comments below.
