And that is why users don’t like to use this browser, and they keep stopping it in Windows 10. While it’s difficult to disable Internet explorer completely on Windows 10, an option lets you uninstall it.
Steps to Completely Uninstall Internet Explorer from Windows 10
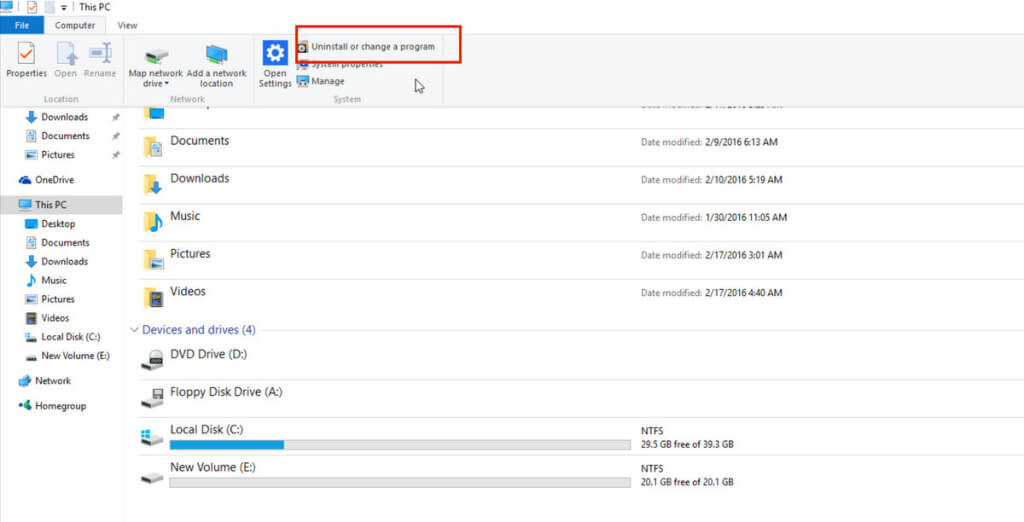
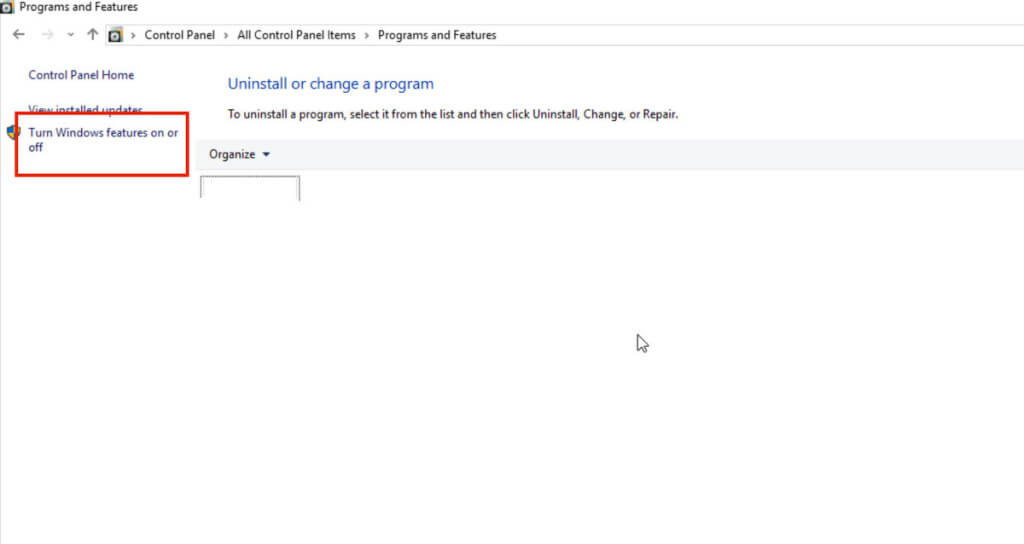
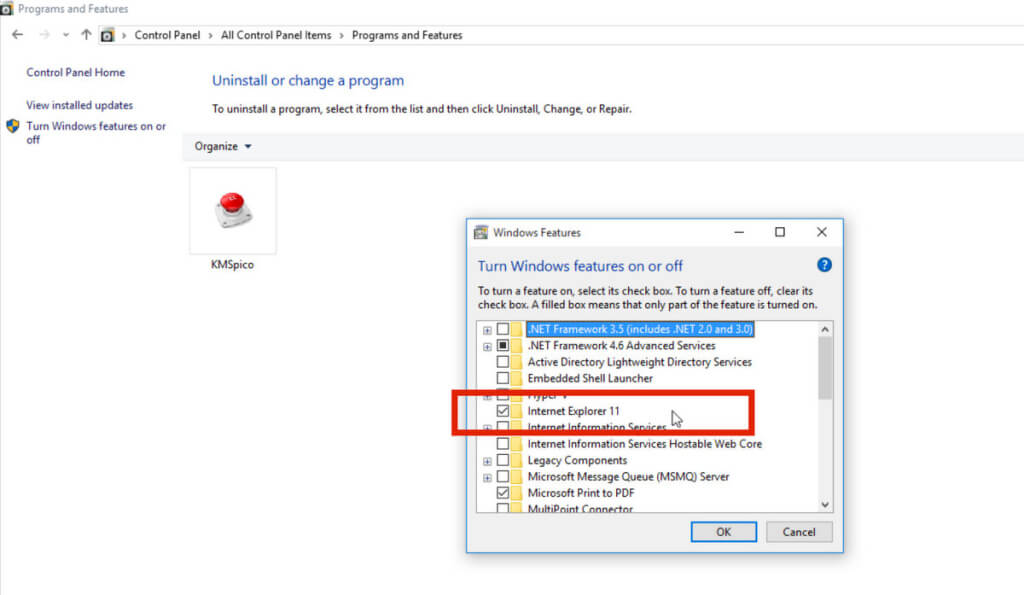
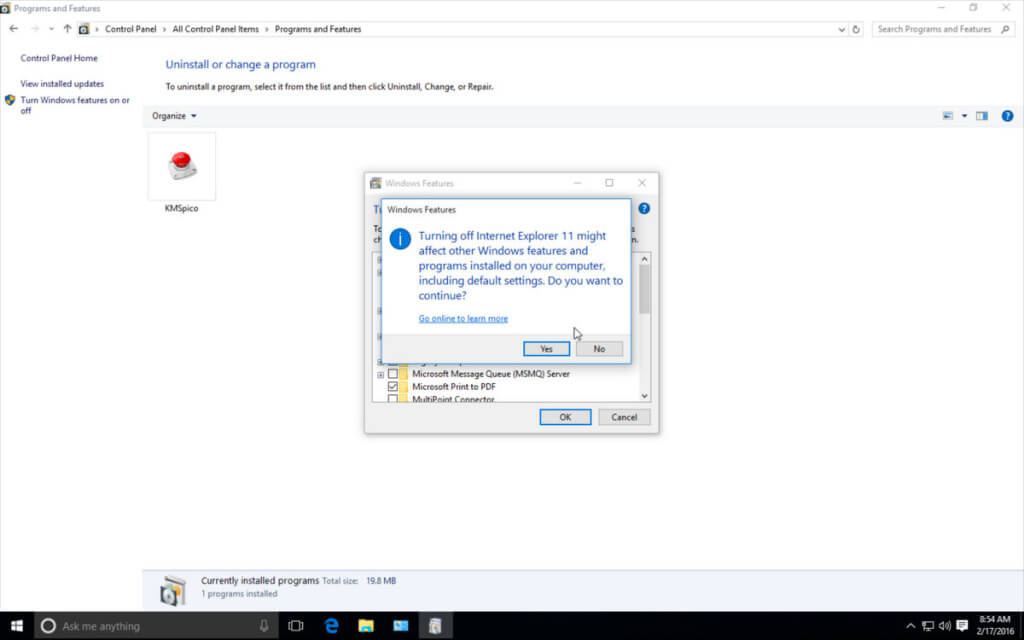
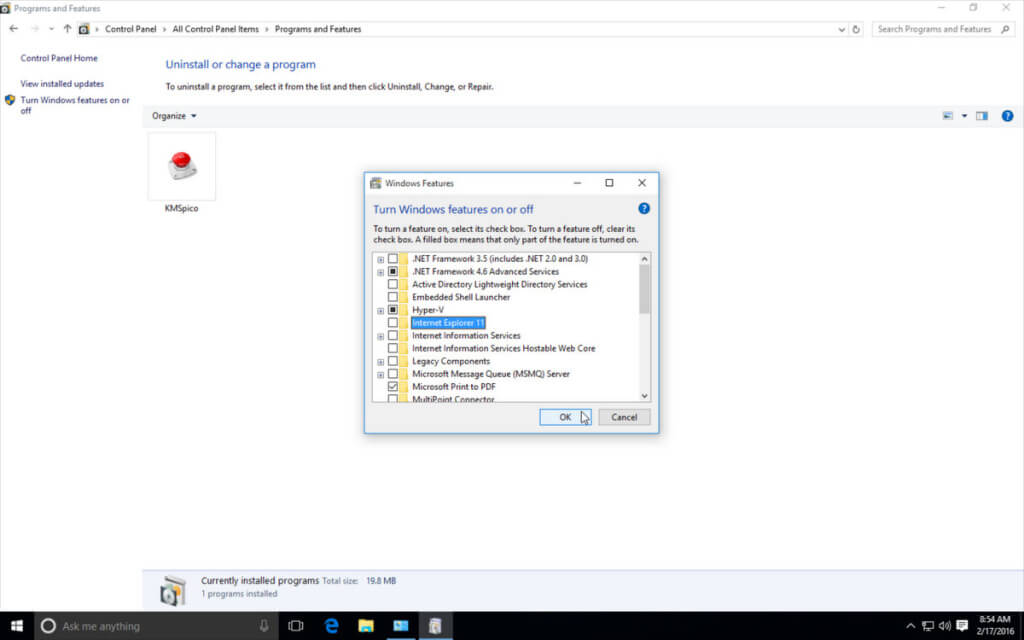
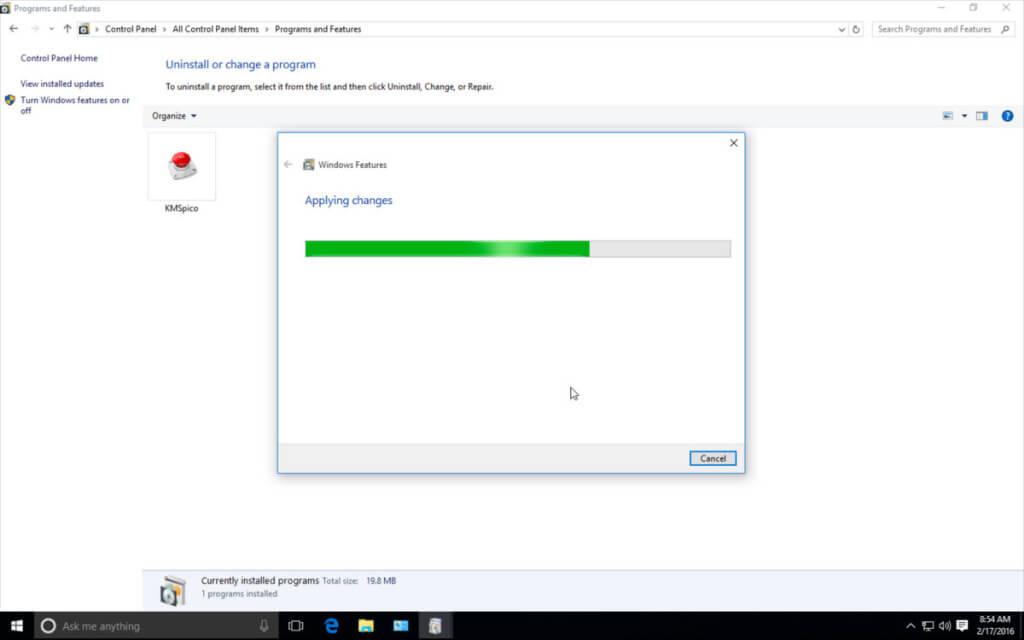
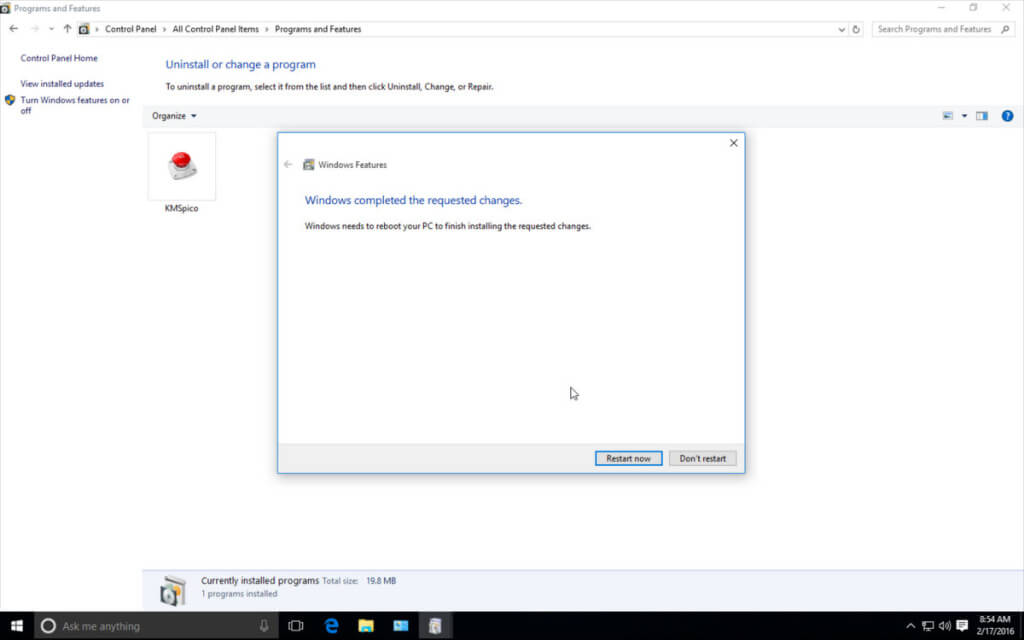
So, if you don’t want to use Internet explorer again on your Windows 10, you can choose to uninstall it. Below, we have shared steps to uninstall Internet Explorer from Windows 10. Let’s check out. 2. On the next window, select the Turn Windows features On or OFF option. 3. Now, uncheck the Internet Explorer 11 option. 4. Now select Yes and move to the next steps. 5. Now, you need to click on the OK button. 6. Your system will take a few minutes to apply the changes. 7. Click the Restart Now button to uninstall Internet Explorer 11 successfully from your Windows 10 PC. So above is all about how to completely uninstall Internet Explorer from Windows 10. I hope you like this, do share with others too. Leave a comment below if you have any related queries about this.