The higher the refresh rate, the better will be your gaming & video viewing experience. Alternatively, a lower refresh rate results in screen flickering and can lead to eye strain & headache. Windows operating system provides you an option to change the monitor refresh rate, allowing you to take the most out of your hardware specs. However, before that, it’s important to know the supported refresh rate of your monitor.
Check Your Monitor’s Refresh Rate in Windows
If you do so, you can switch back and forth the refresh rate your monitor supports. Finding the monitor’s refresh rate is pretty easy on Windows; you just need to know the right methods. Below, we have shared a few simple ways to check your Minotor’s refresh rate in Windows. Let’s get started.
1. Check Monitor Refresh Rate – DirectX Diagnostic Tool
DirectX Diagnostic Tool is a tool for troubleshooting various graphical and sound problems. You can also use the DXDIAG tool to check your PC’s hardware specifications. Here’s how to use DirectX Diagnostic Tool on Windows 11 to find your monitor’s refresh rate.
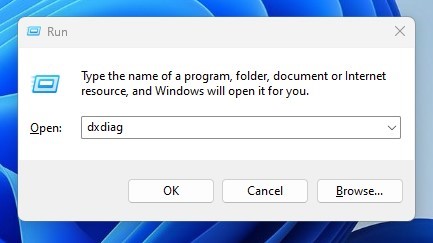
Press Windows Key + R button on your keyboard to open the RUN dialog box.
When the Run dialog box opens, type dxdiag and press Enter button.
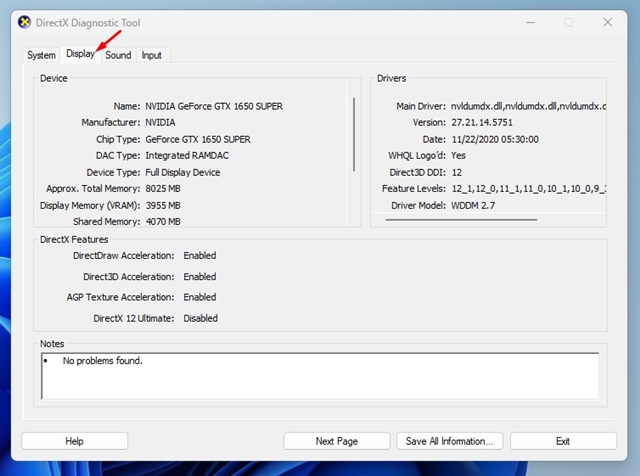
Switch to the Display tab, as shown in the screenshot below.
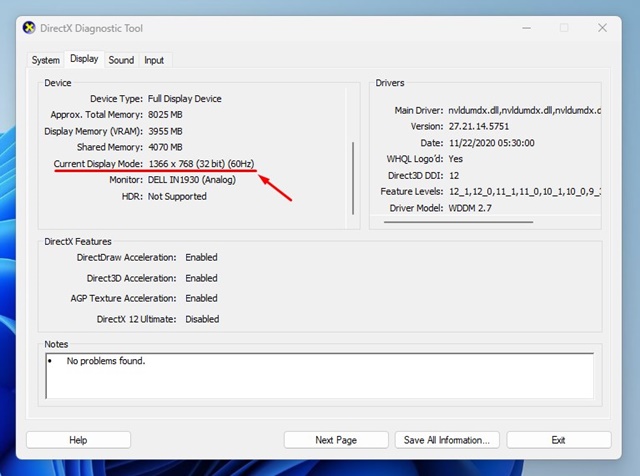
Now check the ‘Current Display Mode‘ text. The refresh rate is displayed just beside your monitor’s resolution.
That’s it! After checking the monitor refresh rate, click the Exit button on the DirectX Diagnostic Tool to close it.
2. Check Monitor Refresh Rate via Windows Settings
Windows 11’s Display Settings also show you the monitor refresh rate. The option is hidden deep under the settings; here’s how to find it.
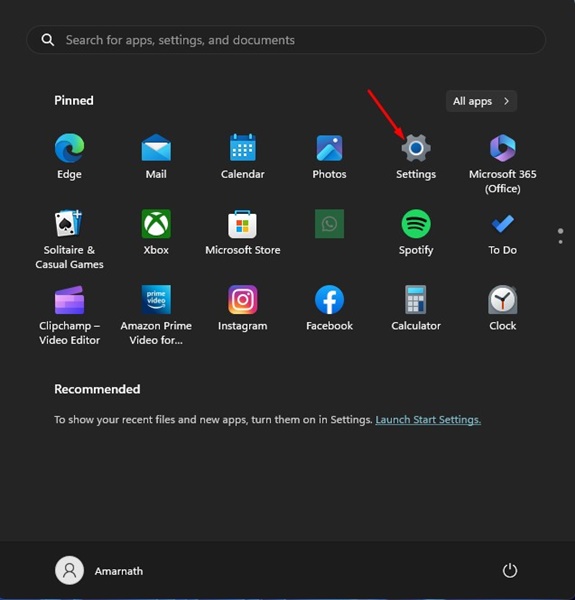
Click on the Windows Start button and select Settings.
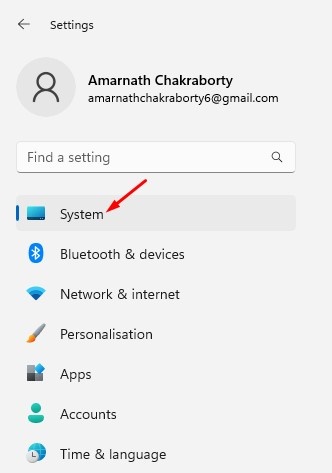
On Settings, switch to the System tab on the left pane.
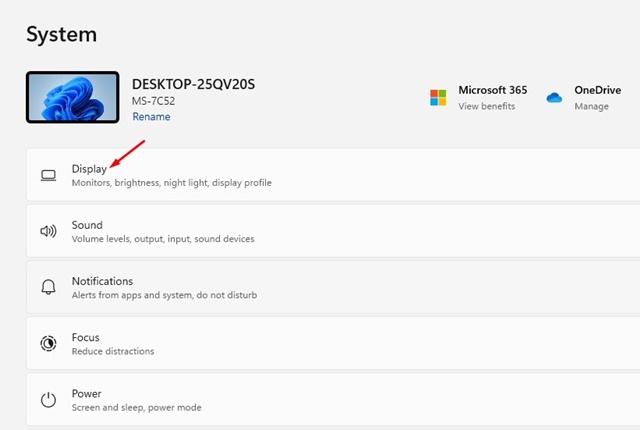
On the right side, click on the ‘Display‘.
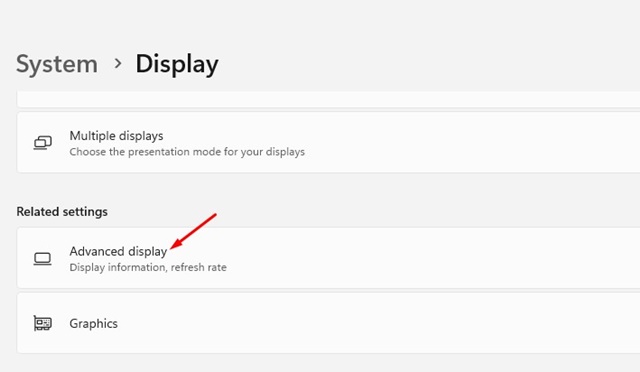
Under the display, scroll down to the Related Settings section and click ‘Advanced display‘.
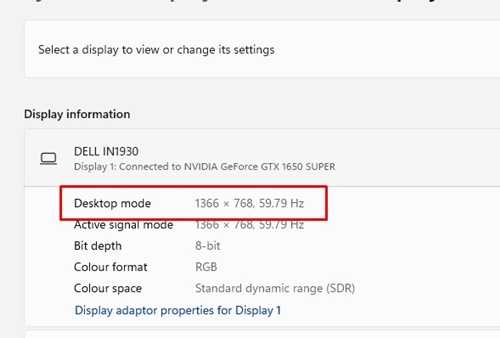
Select your display from the drop-down and check the Desktop mode text. The figure displayed at the end is your monitor’s refresh rate.
That’s it! After checking the Refresh rate, you can close the Settings app on your Windows 11.
3. Use TestUFO website to Check your Monitor Refresh Rate
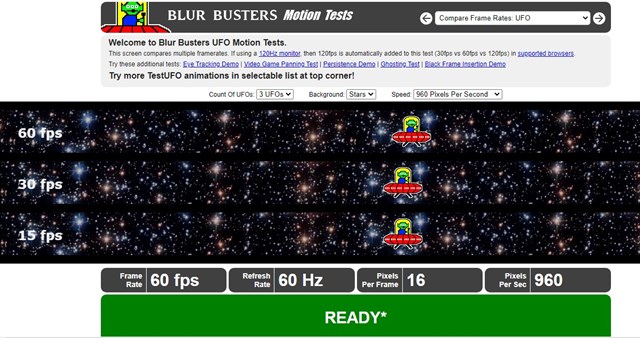
TestUFO is basically a website that displays the frame rate, refresh rate, Pixel per frame, and Pixel per second. You don’t need to download & install anything on your computer or create an account. Just open your favorite web browser and visit this webpage. At the bottom of the page, you will find a few helpful information and the screen refresh rate.
4. How to Check the Monitor Refresh Rate on Windows 10?
The steps to check the monitor refresh rate vary on Windows 10. Here’s what Windows 10 users should do to check the monitor refresh rate.
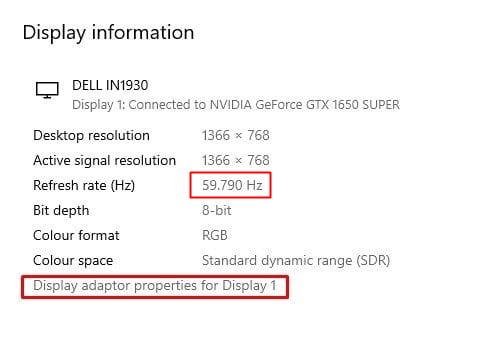
Right-click anywhere on your desktop and select ‘Display Settings‘. On the Display Settings, scroll down a bit and find an ‘Advanced display settings‘ link. Simply click on it. On the Choose display drop-down, select your monitor. You will see your monitor’s refresh rate in the Display information section.
That’s it! This is how you can check the monitor refresh rate on your Windows 10 computer.
How to Change Monitor Refresh Rate?
Let’s say you have a gaming monitor that supports 144Hz Refresh Rate, but it’s set to 60Hz on your Windows 11. In that case, you can adjust your monitor’s refresh rate to 144Hz. If your PC’s monitor runs at the wrong refresh rate, you can easily change it from Settings. And it’s straightforward to change the monitor refresh rate in both Windows 10 and 11. For that, follow our guide – How to Change Monitor Refresh Rate. So, that’s all about how to check your monitor’s refresh rate. All of the methods we shared will help you find your monitor’s refresh rate without any extra app installation. It is good to set the refresh rate to maximum if you have a high-end PC and a gaming monitor. Doing this will help you achieve better frame rates in gaming & smoother experience.
