The new animation looks good, but it can drain the battery life of your laptop. Even it can slow down your computer if you have a low or mid-end processor and less than 4GB of RAM. If you are experiencing app lag, frequent system crashes, BSOD errors, etc., after upgrading to Windows 10, you may like to change the Windows Menu Animation. Changing or disabling the animations used in Windows can speed up the performance of your device and can rule out many issues. Here’s how to change Windows Menu animations to get a faster experience.
Disabling Windows Menu Animations Duration
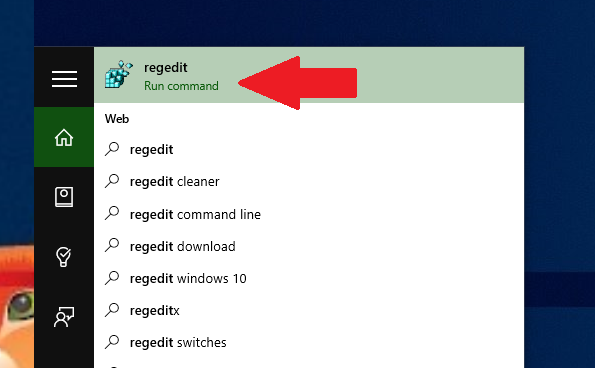
First of all, press the Win+R keys on the keyboard. This will open the RUN dialog box, type regedit and press the Enter button.
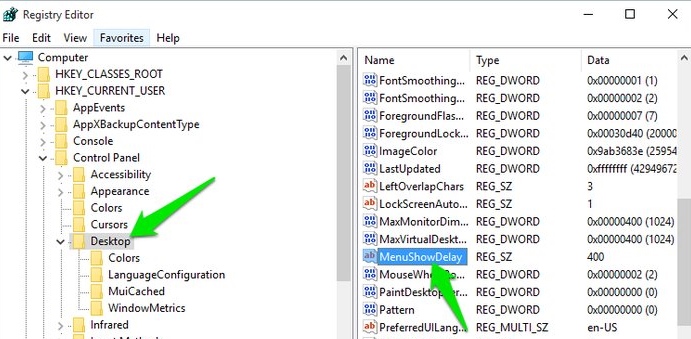
Now in the registry settings, navigate to the location HKEY_CURRENT_USER\Control Panel\Desktop.
There at the right panel, find the option MenuShowDelay. This is the option that stores the time duration of the Start Menu animation.
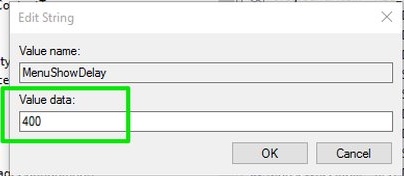
By default, the value of this key is set to 400 milliseconds; this means the animation will take 400 milliseconds while triggering. You can decrease this time and can make it to 200 milliseconds or less to reduce the delay time.
That’s it! With this, the windows Menu Animations Duration will get decreased.
Disable Windows Menu Animations
If you want more visible results and load the OS functions without any extra animations and sounds, then you can also do that on your PC by following the steps below.
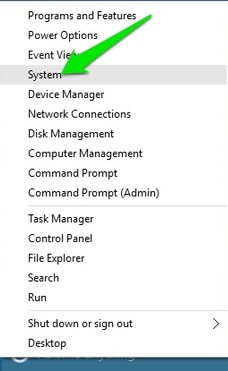
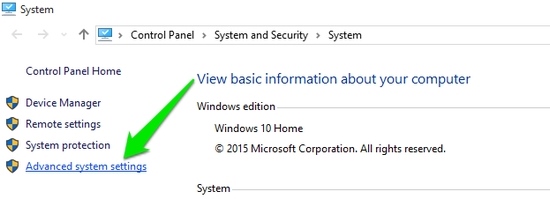
- First of all, right-click on the start button and select System.
2. Now in the system, click on the option “Advanced system settings“.
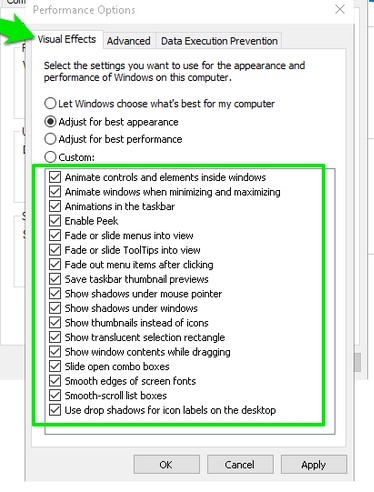
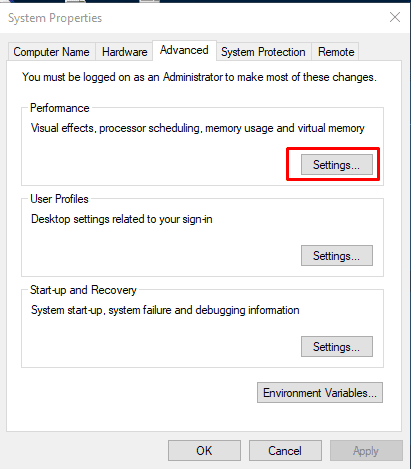
Now under the performance, choose the option Settings.
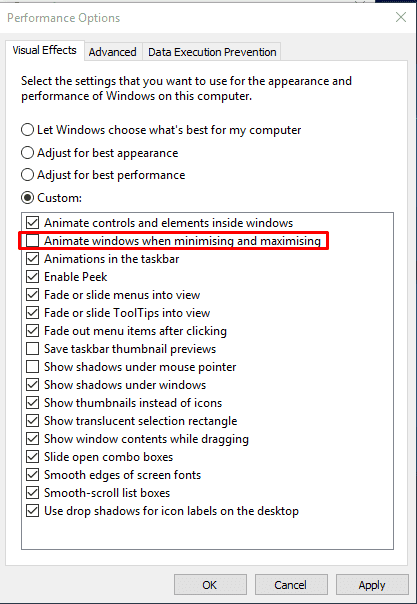
Now in the Visual Effects tab, you will see all the effects that occur while windows boots up, and you can disable them. Don’t blindly disable all visual effects, as it may ruin your Windows experience. Just disable the one you feel is unnecessary.
It’s recommended to uncheck the below options:
Animate controls and elements inside windows Animate windows when minimizing and maximizing
- Once done, click on the Apply button and then on Ok.
Disable Animation To Make Windows 10 Start Menu Open Faster
Windows 10’s new start menu is pretty much useful. However, it takes forever to load. If you’re finding the menu sluggish on your machine, you need to follow some simple steps to make it faster.
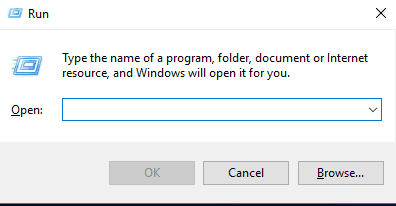
Press Windows Key + R to open the Run dialog box.
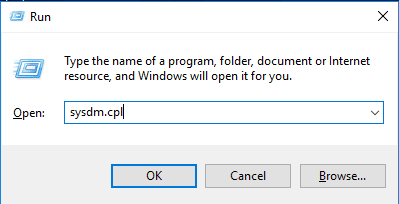
Now on the Run Dialog box, type in sysdm.cpl and press Enter.
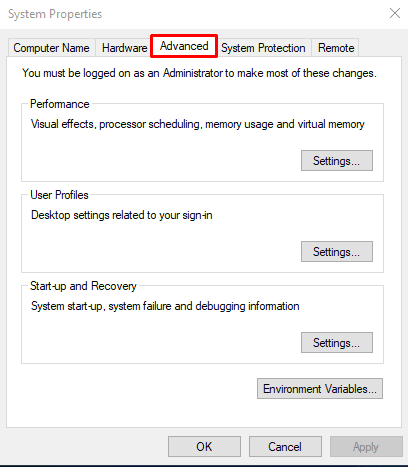
Now it will open the System Properties. Here you need to switch to the Advanced tab.
Now under the Performance tab, click on Settings.
You need to disable the “Animate Windows when minimizing and maximizing” under the Performance.
That’s it! Now, open the Start Menu; it should appear instantly.
Using One-Click Registry Hacks
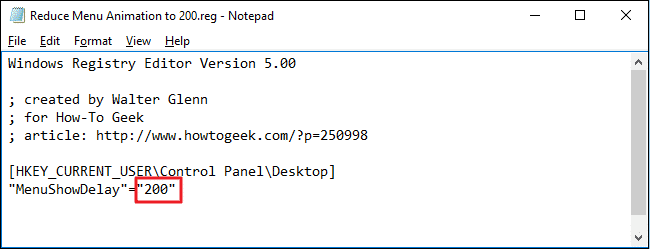
Well, Howtogeek has shared a one-click registry hack that reduces the menu animation to 200. By default, the menu animation has been set to 400 milliseconds. The registry files perform everything we mentioned in the first method. So, if you don’t want to go through all the stuff mentioned in the first method, you can use the hacks provided by howtogeek. Menu-Animation-Speed-Hacks
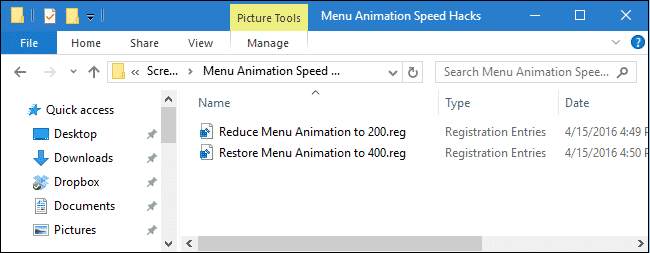
You will get a downloadable ZIP file which you need to extract with 7zip or Winrar. Once done, You will see two registration Entries – Reduce Menu Animation to 200 and Restore Menu animation to 400. The ‘Reduce Menu Animation to 200’ hack sets the menu animation speed to 200 milliseconds. However, if you want to reverse the changes and restore them to the default, you need to use the ‘Restore Menu Animation to 400.’
Not just that, but you can also do a little bit of experiment. For example, you can set the values ranging from 0 to 4000 milliseconds by editing the ‘Reduce Menu Animation to 200’ hack. However, don’t modify the ‘Restore Menu Animation to 400.reg file because it reverses every change. So, this is how you can speed up your Windows 10 computer by disabling the visual effects. If you need more help disabling the Windows 10 Menu animations, let us know in the comments below.
